How to Prepare Hair for Hair Extension Installation
Listen to article
Audio is generated by DropInBlog's AI and may have slight pronunciation nuances. Learn more
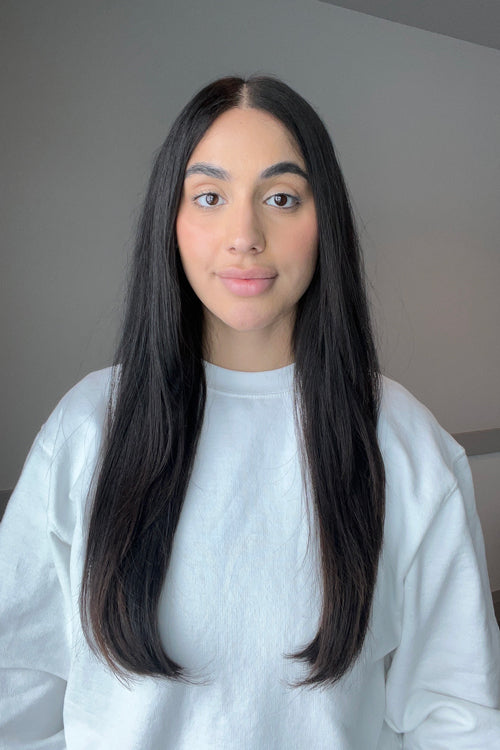
A hair extension installation should be approached in the same way as any other time-intensive, long-lasting procedure. You have to prep the client beforehand, and give them the tools to help them prepare their hair so that it’s extension-ready. We spoke with Mallory (Lane) Chafins (@mallorylanesalon) of Mallory Lane Salon & Gallery about client hair health, hair prep, and tips for getting unruly hair in tip-top shape.
Extension-ready hair is:
- clean
- flake-free
- dry to the touch
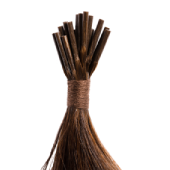
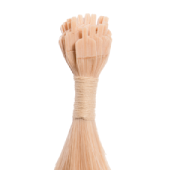
- tangle-free - key for keeping the hair manageable during the installation
- smooth (not brittle)
- reasonably full, long, and sturdy - the hair has to be strong and healthy enough to bear the added weight of the extensions
Related: Tips for Healthy, Growing Hair

It’s important that your client’s hair is in the proper condition come installation time--partly because less-than-ready hair will make the installation process more difficult, but mostly because installing on such hair will risk premature slippage, unnecessary breakage, or even shedding of the natural hair. If the hair is flaky, greasy, or generally unclean, the extension bond will not establish a sufficiently secure grip, and slippage will become more likely. If the hair is tangled during install or unusually brittle, the hair extension installation will cause breakage. If the hair is not strong or full enough to handle extensions, then the hair extension installation will cause shedding.
For most clients, standard upkeep and our classic pre-installation hair routine should suffice to get the natural hair in proper shape for hair extension installation day.
Standard upkeep involves:
- taking good care of overall health by consuming the appropriate amounts of necessary vitamins, minerals, and water for healthy hair growth
- washing hair no more frequently than is necessary for the client’s hair type, and replacing some showers with dry shampoo once the hair extensions are installed
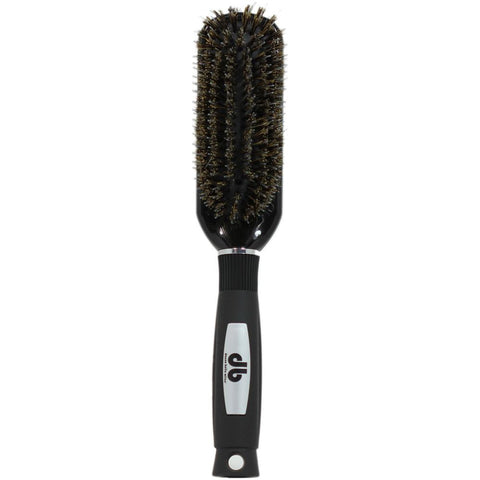
- brushing hair either in the shower (with fingers), after the shower (with a wide-toothed comb), or after the hair has dried naturally (with a boar hair bristle brush)
- minimizing unnecessary heat styling or manipulation whenever possible, opting instead for lower-manipulation methods
- protecting the hair during strenuous or potentially damaging activity, such as swimming, exercising, sleeping, etc.
Our classic pre-installation preparatory routine for the client’s hair involves:
- clarifying the roots of the hair with a sulfate-free clarifying shampoo (we offer one in the form of the Cream Cleanse Shampoo)
- conditioning the mid-lengths and ends of the hair so that they remain smooth and manageable
- brushing the hair so that it’s totally tangle-free
- letting the hair dry fully and naturally
Mallory sums it up quite nicely: "The client should come in with freshly clarified hair that is free of product and only conditioned from the midshaft down."
Related: Clarifying Your Natural Hair for Your First Installation
It is not necessary for the client to straighten their natural hair for an installation, but if they decide to do so, ensure that they do not use any heat protectant on the root area of their hair. Be sure to cover all of these steps during the consultation phase of the hair extension installation process so that your client knows what to expect. And get a good look at the client's hair during the consultation, too. "Healthy install ready hair is determined by a thorough consultation," confirms Mallory. "We have each client that is curious about extensions come in for a complimentary consultation. We discuss with them their lifestyle, hair care routine, concerns, desires and goal outcomes." If you need help conducting your consultation, check out this blog post, and feel free to print out this page for reference (or for your client to take home with them).
What if your client comes into the salon with unprepared hair?
If your client comes into the salon with clearly unclean or unmanageable hair, you may proceed to wash and dry the hair at the salon (possibly for an additional/penalty price). However, there may be occasions where you have to tell your client that their hair is not ready for hair extension installation (generally during the consultation itself). These may involve cases where the length or volume of the natural hair is not sufficient to cover or support extensions, or where damage or underlying health concerns prevent a sustainable or safe installation.
It’s always tough telling an enthusiastic potential hair extension client that you can’t carry out this procedure for them, but there are ways to break the news gently. In each case, you should make an effort to be abundantly honest about the reasoning for your decision. "To make sure extensions will not do damage and/or look unnatural, you have to be realistic," notes Mallory. You should also take care to emphasize your mutual interest in an ideal outcome for the client’s hair. Convince them that what they want--if pursued immediately--would not amount to the ideal outcome you’re both after. And present an alternative plan to get your client the look they want, even if it involves more time or additional steps. "I make sure to tell them that there is nothing wrong," adds Mallory, "but for it to be the best it can be, they may have to wait or take some extra steps. I never say never and there is usually always a solution."
How do I determine a hair care regimen for my client?
The process of devising a hair care regimen with your client will likely be highly personal, so it ought to be conducted in a consultation-style format. You’ll want to get a full picture of not only their current hair care routine and styling practices, but also the client’s health, lifestyle, schedule, stress levels, diet, etc. You have to understand that some clients may not feel comfortable sharing some of this information with their stylist, so be considerate—flexibility is key! Prepare a questionnaire for the client to complete on their own as they wait (like those you might find at a new doctor’s office, but tailored to a salon environment), as well as a Holy Grail salon policy featuring fundamental hair care rules like: use only sulfate-free products, acquire an appropriate brush, etc. (See below for a handy example!)
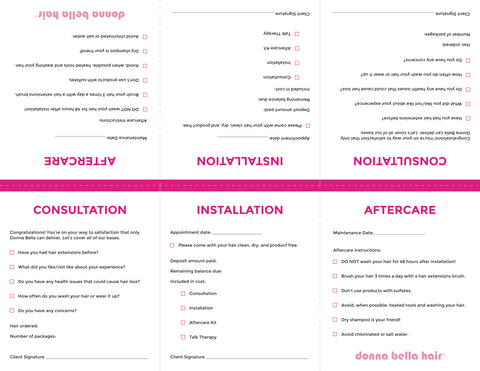
Mallory uses a similar strategy in her own salon. "To establish a treatment regimen, I like to print out an aftercare sheet with all of the instructions needed for caring for the extensions after applied. If there is anything in addition specific to that client, I will write it on their sheet and go through it with them. Pre-booking is a great way to keep them on track as well."
Related: Composing the Perfect Hair Care Routine
Hair Prep Tools:
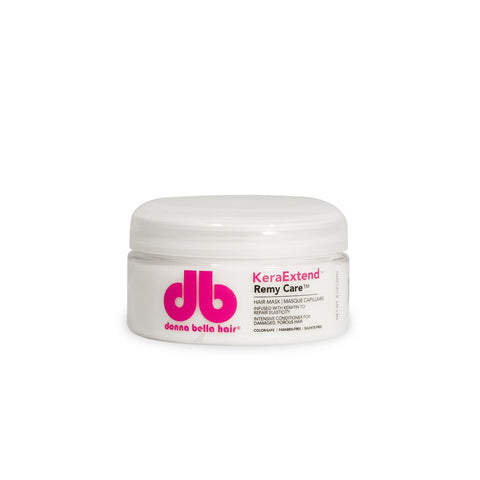
- Donna Bella Remy Care™ products
- supplements for hair fortification, growth, or luster
- heat, styling tool, or product detoxes
- transition time to let colored, permed, or relaxed hair return to its natural state
- hair mask regimens (whether pre-prepared or at-home recipes)
- in-salon treatments like revitalizing services, glosses, etc.
- or, in extreme cases, a nudge to visit a licensed health care practitioner.
A heavier-duty intervention (as in the last example) may be necessary if you notice such red flags as: unexplained bald patches or excessive thinness; red, swollen, bruised, blistered, or otherwise damaged skin on the scalp of the head; or open wounds on the head, ears, or neck area.
How to prepare specific hair types for installation...
For healthy hair, all that needs to be done pre-installation is simply clarifying the roots, conditioning mid-lengths and ends, detangling hair, and drying it thoroughly and naturally. During extension wear, supplement existing hair care regimen with a dry shampoo in order to reduce shower frequency.
Recommended: How to Have a Great Hair Extension Experience
For greasy (but otherwise healthy) hair, thoroughly clarify hair prior to the hair extension installation. It may be best to perform the clarification right before the appointment, so as to prevent the hair from getting greasy after an at-home wash. No conditioner should be necessary for this hair type. During extension wear, encourage the client to make liberal use of dry shampoo, and consider spacing the move-up appointments closer together so as to catch any signs of slippage early on.
Recommended: Avoiding Slippage with an Oily Scalp
Treat dry (but otherwise healthy) hair as you would ordinary healthy hair--that is, clarify a day before the installation. Conditioner will be an important step for this client, and they should apply it from mid-lengths to ends, then detangle their hair in the shower. If any flakes are present in the hair prior to the hair extension installation, brush them out with a boar hair bristle brush, and consider doing this for each layer of hair during the parting/sectioning process. In general, dry hair needs less washing, and these clients may be able to maintain their hair extensions without the use of dry shampoo. However, if they do struggle with dandruff or flakiness, they should consult our blog post on the topic for additional tips.
Thin (but otherwise healthy) hair should be prepared by clarifying but not conditioning the hair, due to the tendency of fine/thin hair to be more slick and oily than thicker strands. For this hair type, selecting a complementary installation method, appropriate hair extension quantity, and ideal spacing are of greater concern than specific aftercare suggestions, but closer move-up appointments could help reduce the likeliness of slippage.
Recommended: Extension Tips for Thin-Haired Ladies
Bleached, colored, and/or porous hair should be treated with caution. If the hair is reasonably healthy still, advise the client to undertake a deep-conditioning regimen for the week prior to installation (washing hair in cold water only). They should then clarify the roots and condition the mid-lengths and ends of the hair on the day before installation.
Clients with more structural damage will need a heavier-duty rehabilitation/revitalizing program before an installation date can be decided. Mallory uses the following strategy: "If a client's hair is too short or damaged to get extensions installed currently, I recommend doing either an Olaplex or conditioning treatment as needed until their hair is long enough. If damage is the issue, I always recommend laying off the heat styling for a few weeks, although extensions will actually help repair their natural hair while they wear them."
Following installation on bleached, colored, and/or porous/damaged hair, clients should continue to use deep-conditioning treatments and/or masks below the bond area to keep natural and extension hair supple and moisturized.
Recommended: Aftercare Guide for Colored Hair Extensions
Finally, natural hair that is actively (or currently) thinning should also be treated with caution. If the cause of thinning is readily understood as a natural, unavoidable, or ongoing process with a regular pace, then extensions may be installed with little risk--though the client should be informed that shedding/loss of strands will be more likely, and move-up appointments may need to be more frequent. If the cause of thinning is unknown, the thinning has come about suddenly, or it is occurring sporadically/at rapid or irregular intervals, then installation should be delayed until the client has consulted a health care professional to ascertain the cause and nature of the problem. Hair extensions may be a visual aid to clients experiencing hair loss, but they are no substitute for correcting underlying health problems (of which hair loss may only be a symptom).
Recommended: Extensions for Thinning Hair
For more tips and tricks to assist you in your hair extension installation, visit our Installation Tips page, or check out the posts below!
4 Things You Should Never Do at a Hair Extension Appointment
Donna Bella Hair: The 48 Hour Rule
How to Balance Hair Care and Extension Care
_____________________________________
Many thanks to Mallory for providing her specialist insight! To learn about her salon and her hair extension practice, visit her website and Instagram page today!
Mallory (Lane) Chafins